Monday, February 21, 2011

Cavity battens

Cavity systems are used in the prevention of water damage to framework and interior cladding.
It is a second line of defence against water getting past the exterior cladding.
Another benefit to a cavity system is its prevention of moisture. Humid conditions cause moisture; this moisture could otherwise get trapped between the exterior cladding and internal framework. The cavity system provides space and allows air to circulate and create a drying effect. Moisture build up is also able to drain away down the vertical and diagonal slopping battens leaving the building through the holes in the vermin strip.
The battens are fixed at 600 centres to the studs.
The treatment of the battens is H3.1 minimum.
The size of the cavity batten we used was 40mm X 20mm, running continuous from the horizontal batten at the top of the wall vertically down to the vermin strip at the bottom. The battens need to be planed to slot in nicely to the vermin strip.
The continuous horizontal cavity batten at the very top of the wall will prevent air getting into the roof space.
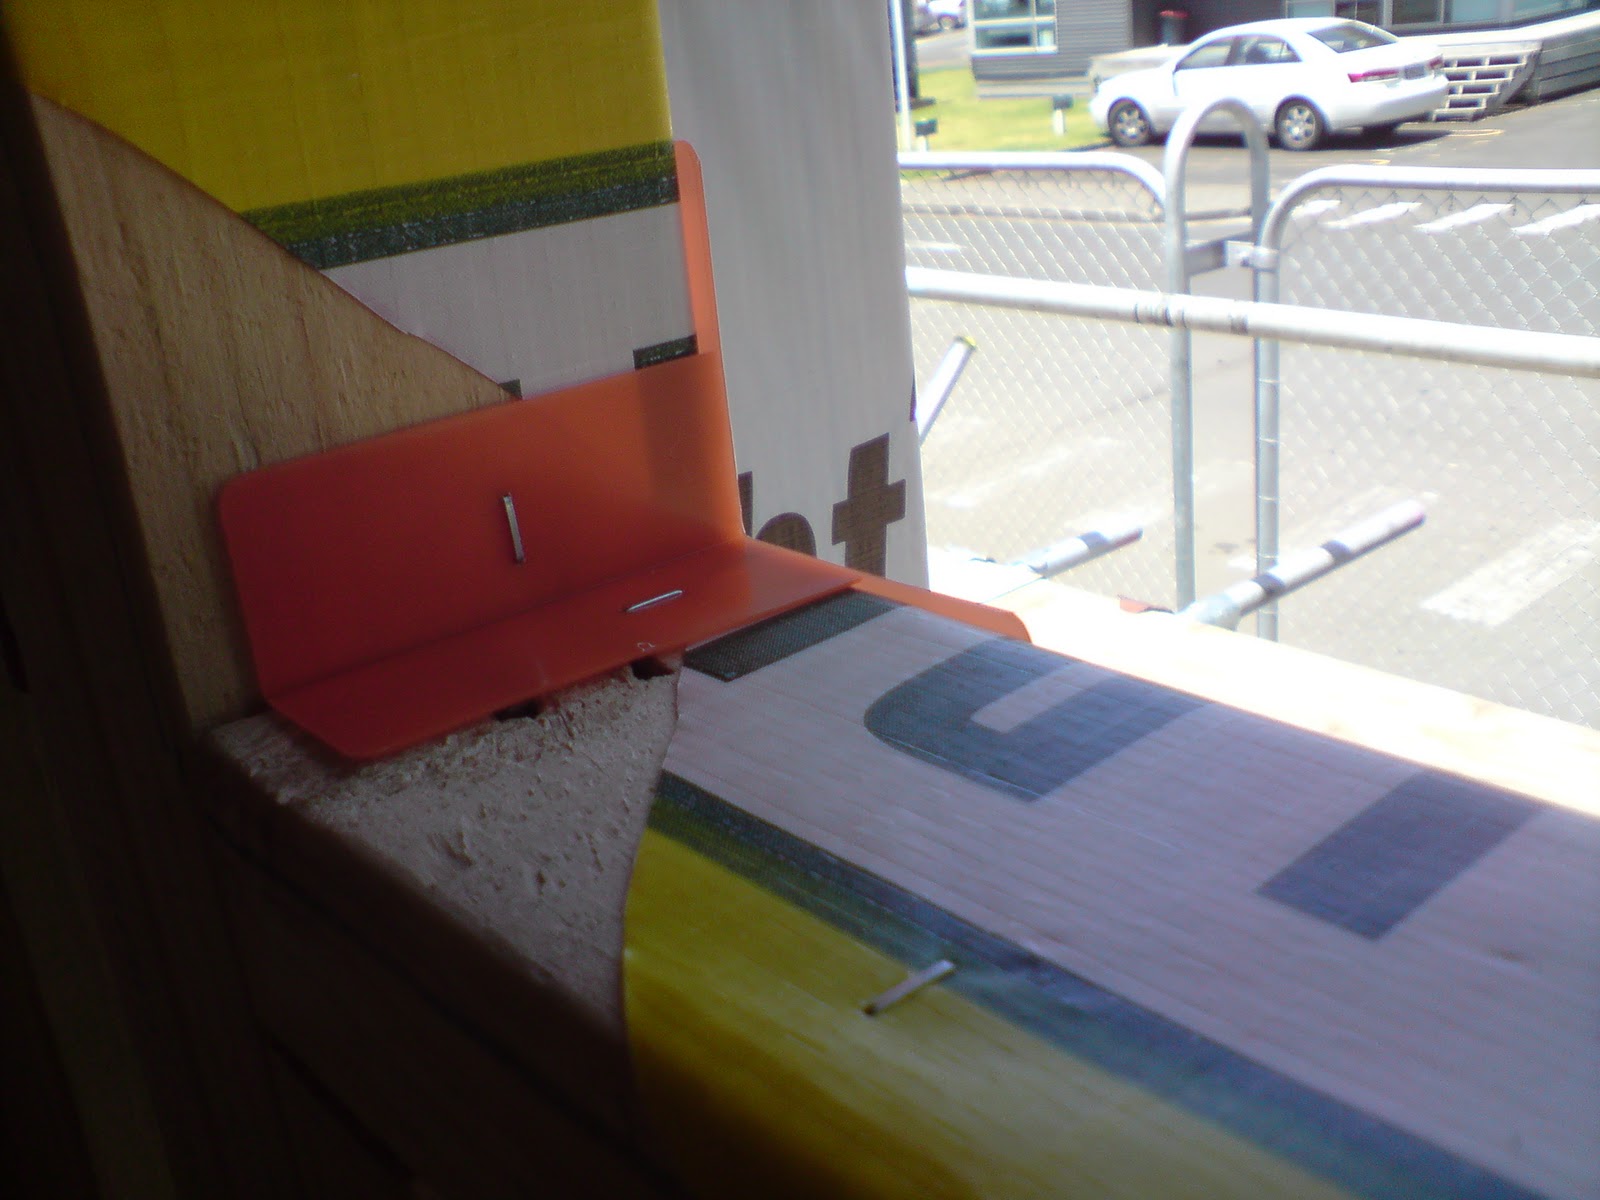
On the unitec house we used slightly smaller cavity battens to the sides of  the doors and windows, and on each corner of the house to allow for the corner flashings.


We fix the cavity battens at 300mm spacing (hammer length) with galvanised flooring nails.
We cut a notch above the windows and doors on either side of the cavity battens to allow for the vermin strip and flashing to be installed.
The flashing gets fixed to the building paper on the lintel with Alu band and against the top of the window or door.


The vermin strip then gets stapled above the flashings at least 25mm above the flashing.

Wednesday, February 2, 2011

Soffit

We had to cut the soffit lining so we lay down three pieces of timber, measured and marked off where we would cut, and cut in between two of the pieces of timber.
We started the soffit at the back end of the house at the apex. The joiner is placed upside down at the apex and the other way round for the rest of the house.
The soffit gets slotted into a gap in the guttering and fixed close to the wall.


We measure and cut it to fit like a jigsaw round the house.
Previous to installing the soffit we mark were the nogs will be so we can fix at the centre of the soffit at equal spacings.
Once the soffit was up we could put in the cavity battens that run just under the soffit horizontally and the vertical ones also. We planed back the cavity batten at the bottom to fit into the vermin strip.


The meter box needed to be assembled according to its instructions, and the gap in the framing needed to be packed out to house it nicely.

Here is the meter box fitted, with flashing.
After finishing all the vertical cavity battens we went on to staining the weatherboards.
We built a stand for the weatherboards to dry, and then shelves to stack them on inside the house.

Wrapping house and fitting windows and doors

Now we had finished fitting, fixing and bracing the roof framing, it was now the roofers job to come along and lay the corrugated iron roof and fix the guttering.
Next we needed to wrap the house with building wrap. One of us held the roll at the top, one supported the wrap along the bottom of the house and we had guys stapling as we went round the perimeter. The building wrap is used to protect the wood framing from water that can penetrate the exterior cladding, it wont let water through. Moisture from humidity can also get trapped in walls and cause the wood to rot, the wrap is breathable so it eliminates that problem that building paper can cause.
Next we needed to cut the window and door openings and there was a special way to do this.

  We cut at 45 degree angles at the corners to the centre then along, allowing us to have wrap that can be pulled around the window and door framing to continue the protection from water traveling.
We stapled in these plastic window flashing's to protect against leeks
We used the window and door sealing tap Alu band. We measured 200mm up the side from each corner and measured to have enough to cover the base and 200mm up the next side.
The Alu band is stuck down hanging over the exterior side only and cut at the corners and folded down.
Whats called a butterfly piece is cut to join these two pieces for water tightness.
The blue plastic strip is stapled round the perimeter of the house at two levels on the walls to aid the staples in stopping the building wrap from blowing out.
Inserting the aluminium windows and doors was next.
First the cavity battens that go vertically at each door or window must be fixed. We have them protruding past the sill and below the door frame 50mm.

These had to all sit at the same height, so when we come to laying the weather boards we wont have to cut them to fit around widows and doors all at slightly different heights, it'll all be the same and it will look better.
After fitting the front ranch sliding unit, we measured the height and marked it on a long piece of timber and used this mark to line up the rest of the windows and doors in the house.
We used wedges and blocks to straighten, level and centre the aluminium units.
The windows and doors needed to be set so they were 10mm inside the rooms to allow for the Gib board to be flush against the window and door units, we used the thickness of our rulers as a guide.
We then fixed them with galvanised nails with the head protruding.
Here is my laundry door and window unit temporarily fixed level and at the correct height


Mean while the vermin strip is getting fixed along the base of the house, it has small holes for moisture and water to escape but protects from mice etc getting into the walls.
Cavity battens are also placed below each door and window frame set at an angle so and moisture and water will run off them.